

Pipeline stages
Configure the steps, rules, requirements, approvals, access, and notifications inside an application pipeline.
Stages are the working steps inside a pipeline. They tell users where an application is right now, what should happen next, and which rules apply before the application can move forward.
Use this guide after the pipeline itself is created. If you need to create the pipeline first, start with Pipelines.
What this guide helps you configure
Use this guide when you need to set up the options inside a stage.
Stage configuration can control:
- The stage name, type, color, and description.
- Expected and maximum time in the stage.
- What happens when an application stays too long.
- Whether the stage is required.
- Whether approval is needed before work continues.
- Which roles can work in the stage.
- Whether users can move applications backward from or through the stage.
- Which roles are notified when applications enter the stage or become delayed.
- Which checklist templates apply at the stage.
Before you start
Prepare these items before you configure stages:
| Item | Why it matters |
|---|---|
| Pipeline stage order | Stage rules make more sense when the order is already agreed. |
| Roles | Access, approvals, and notifications depend on role setup. |
| Document types | Stage requirements may ask for specific documents. |
| Fields | Stage requirements may ask for important application details. |
| Checklist templates | Stages can assign checklist work to the right person. |
| Approval process | Approval settings need clear reviewer roles and next actions. |
Keep the first version practical. It is better to start with clear stage names, simple requirements, and a few useful notifications than to create a workflow that is hard for the team to use.
Open the stage list
Use this path when you want to edit stages:
- Open Settings.
- Go to Pipelines.
- Stay on Active Pipelines.
- Find the pipeline you want to update.
- Open the three-dot menu on the pipeline card.
- Select Edit.
- Go to Pipeline Stages.
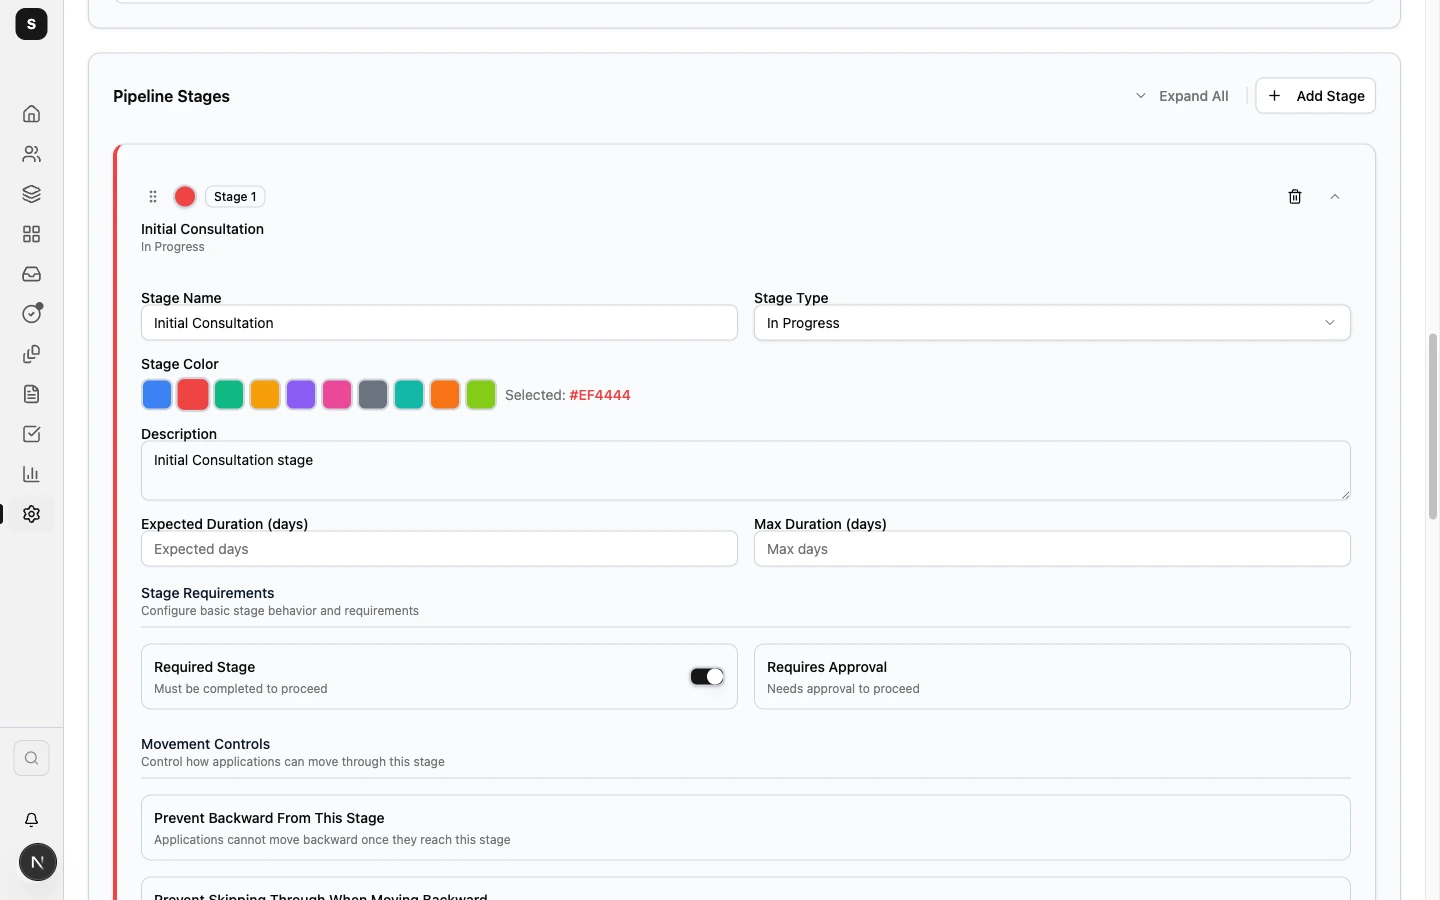
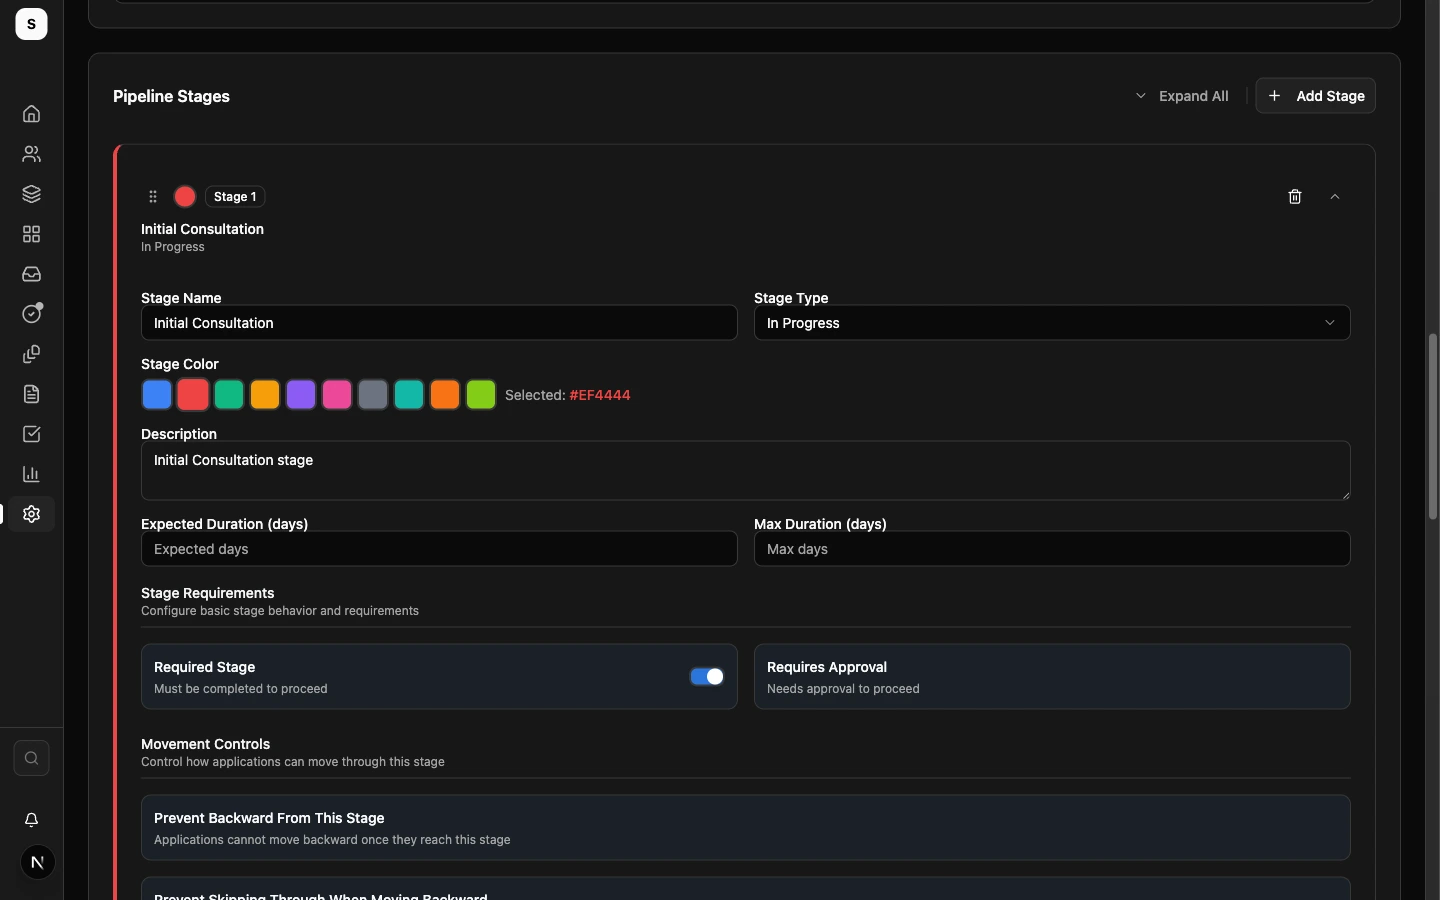
The Pipeline Stages area includes Expand All, Collapse All, and Add Stage. Each stage appears as a stage card. A collapsed card shows the stage number, stage name, stage type, and badges such as Approval. Use the drag handle to reorder stages. Expand a stage card to edit its details.
How to think about a stage
A stage should represent one clear work state. It should answer the question: what is happening with this application right now?
Good stage names are short and familiar, such as Document Collection, Visa Application, or Pre-Departure. Avoid names that only describe a task, a person, or a private internal shortcut.
Use fewer stages when the work is simple. Use more stages only when the team needs separate ownership, requirements, reporting, or approvals.
Stage details
Start with the basic details at the top of the expanded stage card.
| Setting | How to use it |
|---|---|
| Stage Name | Enter the label users will see in the workflow. |
| Stage Type | Choose what the stage means for status, reporting, and final outcomes. |
| Stage Color | Choose the color users will see on stage views and pipeline cards. |
| Description | Explain what should happen while the application is in this stage. |
Write descriptions in plain operational language. A user should understand what to check, collect, submit, review, or confirm while the application is in that stage.
Stage type
Stage Type gives Edmissa the meaning behind the stage. The stage name can match your agency language, but the type should match the actual workflow state.
| Stage type | Use it when |
|---|---|
| New | The application has just entered the pipeline. |
| In Progress | Work is actively happening. |
| On Hold | The team is waiting for the student, institution, partner, payment, or result. |
| Completed | The application reached a successful final outcome. |
| Withdrawn | The student stopped the process. |
| Failed | The application reached an unsuccessful final outcome. |
| Lost | The student chose another path before the agency completed the process. |
Be careful with final stage types. Completed, Withdrawn, Failed, and Lost can affect how applications are reported and reviewed later.
For Student Visa Processing, choose one clear successful outcome pattern:
| Pattern | Stage type guidance |
|---|---|
| Visa Approved is the final successful outcome | Set Visa Approved to Completed. Manage pre-departure work with tasks or follow-ups outside the application pipeline. |
| Pre-Departure is the final successful outcome | Keep Visa Approved as In Progress, then set Pre-Departure to Completed when travel and handover support are done. |
Do not set Visa Approved to Completed if users still need to move the same application into Pre-Departure. Reports may show the application as complete before the team has finished the remaining work.
How stage settings work together
Some pipeline settings and stage settings affect the same movement or notification behavior. Review these pairs before you turn on strict rules.
| Settings | How they work together |
|---|---|
| Allow Skip Stages and Required Stage | Allow Skip Stages lets users skip stages only when the stage is not required. Turn on Required Stage for steps that must never be skipped. |
| Prevent Backward Movement and stage movement controls | Pipeline-level backward prevention affects the whole workflow. Stage movement controls are more targeted and should be used for milestone stages. |
| Auto Progression and duration actions | Auto Progression controls automatic movement through the workflow. Duration actions only run when a stage exceeds its maximum duration. |
| Notify on Delay and automation notifications | Notify on Delay tells roles when a stage is taking too long. Automation notifications tell roles when an automatic action actually happened. |
| Approver verification and stage checklists | Approver verification is for the reviewer. Stage checklists are for the user doing the stage work. Use both only when both people have real work to confirm. |
| Stage settings and Pipeline Form Management | Stage settings control rules and movement. Pipeline Form Management controls which form template users see in each stage. |
Timing
Use timing settings when the team needs to see whether work is moving at the right pace.
| Setting | How to use it |
|---|---|
| Expected Duration (days) | Enter the normal number of days an application should stay in the stage. |
| Max Duration (days) | Enter the longest acceptable number of days before the application needs attention. |
| When Duration Exceeded | Choose what happens after the maximum duration is reached. |
When Max Duration is set, choose one duration action:
| Action | What it does |
|---|---|
| Do Nothing (notify only) | Sends a notification, but does not move or archive the application. |
| Archive Application | Archives the application automatically. Use this only when the rule is clear and safe. |
| Move to Another Stage | Moves the application to a selected stage automatically. |
Use automatic movement carefully. It works best for clear waiting states, such as a stage where an application should move to On Hold after a deadline. For important student work, notify the team first unless the agency has a firm process.
Stage requirements
Stage Requirements control basic behavior before an application can continue.
| Setting | How to use it |
|---|---|
| Required Stage | Turn this on when the stage must be completed before users can move past it. |
| Requires Approval | Turn this on when a reviewer must approve the work before it continues. |
Use Required Stage for steps the team must never skip, such as document review or visa submission. Leave it off for optional support stages, such as Interview Preparation when only some students need it.
Required fields and required documents can also affect whether an application is ready to move forward. Keep requirements focused on information users truly need at that point in the workflow.
Approval roles
When Requires Approval is turned on, the Approval Roles setting can appear. Use it to choose which roles can approve applications at that stage.
Leave Approval Roles empty only when any user with approval permission can review the stage. Select roles when approval should belong to a specific group, such as managers or senior application officers.
For Student Visa Processing, approvals are useful before high-risk moments:
- Before University Application when a senior officer checks the application pack.
- Before Visa Application when a manager checks financial documents and form details.
- Before Visa Approved when the team confirms the outcome and next steps.
Approver verification
Require Approver Verification can appear when approvals and checklist templates are available.
Use this setting when the approver must complete a checklist before approving, declining, or requesting revision.
| Setting | How to use it |
|---|---|
| Verification Checklist Template | Choose the checklist the approver must complete. |
| Verification Blocking Mode | Choose how strictly the checklist blocks approval. |
| Hard Block (Required) | The approver must complete the checklist. |
| Soft Block (Override allowed) | The approver can override the checklist with a reason. |
Use hard blocking for compliance-sensitive reviews. Use soft blocking when the approver may need flexibility but should still explain why the checklist was not completed.
Approval actions
Approval Actions control what happens after approval or decline.
| Setting | Options |
|---|---|
| When Approved | Stay in Current Stage or Move to Stage. |
| When Declined | Stay in Current Stage, Archive Application, or Move to Stage. |
| Target Stage | The stage Edmissa should move the application to when Move to Stage is selected. |
| Revision Limits | The maximum number of revision requests allowed. Leave empty for unlimited revisions. |
Use Stay in Current Stage when the reviewer only needs to record a decision. Use Move to Stage when the decision should carry the application forward or send it back to a correction stage.
Use Archive Application on decline only when the agency has a clear rule that the application should stop.
Automation notifications
Automation Notifications can appear when a stage has an automatic action, such as duration movement or approval movement.
| Setting | How to use it |
|---|---|
| Automation Notifications | Send notifications when automatic actions happen. |
| Notify Roles | Choose which roles should be notified. Leave empty to use default roles. |
Keep this on for important actions. Users should know when an application moved or was archived because of a rule.
Movement controls
Movement Controls decide how applications can move backward around a stage.
| Setting | How to use it |
|---|---|
| Prevent Backward From This Stage | Stops applications from moving backward after they reach this stage. |
| Prevent Skipping Through When Moving Backward | Stops users from skipping this stage while moving an application backward. |
Use Prevent Backward From This Stage for milestone stages where going back would create confusion, such as Visa Approved.
Use Prevent Skipping Through When Moving Backward when the stage must remain visible during corrections. For example, if a visa application needs revision, the team may need to move back through Document Collection instead of jumping past it.
Stage access control
Stage Access Control decides which roles can access and work on applications in a stage.
| Setting | How to use it |
|---|---|
| Access Type | Choose All Roles or Selected Roles Only. |
| Allowed Roles | Choose the roles that can access the stage when Selected Roles Only is used. |
Use All Roles when the stage does not need special access control.
Use Selected Roles Only when the stage belongs to a specific team. For example, Application Officers may handle University Application and Visa Application, while Counsellors may handle Initial Consultation and Pre-Departure.
Be careful when using Selected Roles Only. If no roles are selected, users may not be able to access applications in that stage.
Notifications
Notifications help the right roles know when stage work needs attention.
| Setting | How to use it |
|---|---|
| Notify on Entry | Sends a notification when an application enters the stage. |
| Notify on Delay | Sends a notification when an application is delayed in the stage. |
| Entry Notification Roles | Choose who should be notified on entry. |
| Delay Notification Roles | Choose who should be notified on delay. |
Use Notify on Entry for stages where another role must start work quickly, such as University Application or Visa Application.
Use Notify on Delay for stages with deadlines, such as Document Collection or Visa Application. Avoid notifying too many roles. The best notification is one that reaches the person who can act on it.
Checklists
The Checklists section appears when checklist templates are available. Use it to assign checklist templates that should be completed at the stage.
Each assigned checklist shows its template name, blocking mode, item count, and completion responsibility.
| Setting | How to use it |
|---|---|
| Add checklist template... | Assign another checklist template to the stage. |
| Assignee | The assigned user is responsible for completing the checklist. |
| Creator | The user who created the checklist is responsible for completing it. |
| Anyone | Any user with access can complete the checklist. |
Use checklists for work that users should complete consistently, such as document pack review, visa form review, or pre-departure guidance. Keep checklists short enough that users trust them.
Student Visa Processing example
Use these recommendations as a practical first version for Student Visa Processing. Adjust the details for your market before live use.
| Stage | Stage type | Owner role | Required information and files | Checklist or approval | Notification |
|---|---|---|---|---|---|
| Initial Consultation | New or In Progress | Counselor | Student details, destination interest, intake, study level, budget, and assigned counselor. | Use a consultation checklist if the team follows a fixed call structure. | Notify the counselor on entry if assignment is handled by another role. |
| Document Collection | In Progress | Counsellor or application officer | Identity, academic, financial, and language documents that apply to the destination. | Add a document review checklist. | Notify on delay when missing documents often slow the process. |
| University Application | In Progress | Application officer | Institution, program, intake, deadline, and submission details. | Add approval before submission when a senior officer must review the application pack. | Notify the application officer on entry. |
| Acceptance Received | In Progress or On Hold | Counselor and application officer | Offer or acceptance document and next action notes. | Add a checklist for offer conditions if your team tracks them inside the application. | Notify the counselor and application officer on entry. |
| Visa Application | In Progress | Application officer | Visa form details, acceptance document, financial evidence, and submission notes. | Add approval before submission when managers review sensitive cases. | Notify the application officer on entry and notify on delay when deadlines matter. |
| Interview Preparation | In Progress or On Hold | Counsellor | Interview date, interview requirement, and preparation notes when needed. | Add checklist items for appointment booking, mock interview, document pack review, and student guidance. | Leave Required Stage off if only some students need it. |
| Visa Approved | In Progress or Completed | Application officer or manager | Visa outcome and approval document. | Use Completed only if this is the final successful outcome. | Notify the team on entry. |
| Pre-Departure | In Progress or Completed | Counselor | Travel guidance, enrollment reminders, arrival notes, and final support details. | Use Completed only if this is the final successful outcome. | Notify the counselor on entry if the team supports students after approval. |
Do not force every stage to have the same amount of configuration. Some stages only need a name, type, and description. Other stages need requirements, checklists, approvals, access control, and notifications.
Common exceptions
Plan how your team should handle exceptions before the pipeline goes live.
| Situation | Recommended handling |
|---|---|
| Student withdraws | Move the application to a Withdrawn stage or another stage with the Withdrawn type. |
| Visa is refused | Move the application to a Failed stage unless the team will immediately prepare a new submission. |
| Offer is rejected | Use a Failed or Lost stage, depending on whether the institution rejected the application or the student chose another path. |
| Intake is deferred | Use On Hold if the application will continue later. Add a task or note for the new intake. |
| Documents are missing | Keep the application in Document Collection and use Notify on Delay. |
| Interview is not required | Leave Interview Preparation as optional, or allow users to skip it when the stage is not required. |
Test stage settings
Before using stage settings for live work:
- Create a sample application.
- Move it through each stage.
- Confirm required fields and documents appear at the right time.
- Confirm checklist items match the work users actually do.
- Confirm approvals go to the right roles.
- Confirm approval actions move or keep applications where expected.
- Confirm notifications go to the right roles.
- Confirm movement controls allow the right changes and block the wrong ones.
- Confirm final stage types appear correctly in reports.
Ask one counselor and one application officer to test the workflow if both roles will use it.
Good stage habits
- Use one stage for one clear work state.
- Keep stage names short and familiar.
- Use final stage types only for true outcomes.
- Add required items only when they help users work correctly.
- Use approvals for meaningful review points, not ordinary updates.
- Send notifications to the roles that can act.
- Review stage performance after the team has used the pipeline for a few weeks.
Related guides
| Guide | Use it for |
|---|---|
| Pipelines | Create or review the workflow before editing individual stages. |
| Pipeline form management | Choose which form template users see at each stage and for each role. |
| Checklists | Attach repeatable task lists to stage work when users need guided steps. |
| Form templates | Design the forms that users may see while working in a stage. |
| Fields | Create the fields used by requirements, forms, filters, and reports. |
| Document types | Define the file categories that stage requirements may ask for. |
| Notifications | Configure messages sent when applications enter stages or become delayed. |
| Applications | See how stage configuration affects daily application work. |