

Student profiles
Find, create, review, and safely update student profiles in daily agency work.
Student profiles are the day-to-day home for information about a student. Use them to check contact details, study preferences, source context, ownership, location, related applications, documents, and follow-up work.
Watch the student profile walkthrough
This video shows how the student profile brings together the information and work that belongs to the student.
When to use a student profile
Use a student profile when your team needs one shared place for information that belongs to the student as a person.
| Use it for | Examples |
|---|---|
| Identity and contact details | Name, date of birth, nationality, passport number, email, phone, address. |
| Study context | Preferred universities, study level, field of study, intake year, intake semester. |
| Lead context | Lead score, rating, status, and source details that help with follow-up. |
| Team ownership | Assigned user, location, and who should handle the next step. |
| Related work | Applications, tasks, documents, relationships, and groups or cases. |
If the person first arrived through Leads, review the Lead before making a new profile. Convert or continue from the Lead when that is the configured workflow, so source details and history stay connected.
Find a student
Open Students from the main navigation. Use search when you know part of the student's name, email, phone number, city, or other visible details.
The Students list also gives you quick ways to narrow the work:
| Control | Use it when |
|---|---|
| Student type tabs | Choose Students if your workspace shows more than one profile type. |
| Status tabs | Narrow the list to Active, Inactive, Pending Approval, Rejected, Completed, or Archived profiles. |
| Add filter | Combine filters such as status, location, source, assigned user, or creator when those options are available. |
| Activity counts | See whether a student already has applications, tasks, or documents before opening the profile. |
| Row actions | View details, edit, change status, change location, archive, or delete when your role allows it. |
Before creating a new profile, search first. Duplicate profiles make applications, documents, and follow-ups harder to trust.
Create a student profile
Use Create Student when the student should be added directly by your team. Your workspace may also show an add action from Students when profile creation is enabled.
- Open Create Student.
- Complete the identity fields your workspace asks for, such as first name, last name, date of birth, nationality, and passport number.
- Add contact details and any additional study details your team needs.
- Review any Application Options shown by the form. These depend on how your admin configured the form.
- Choose an assignee if the form asks for one and you already know who should own the work.
- Submit the form.
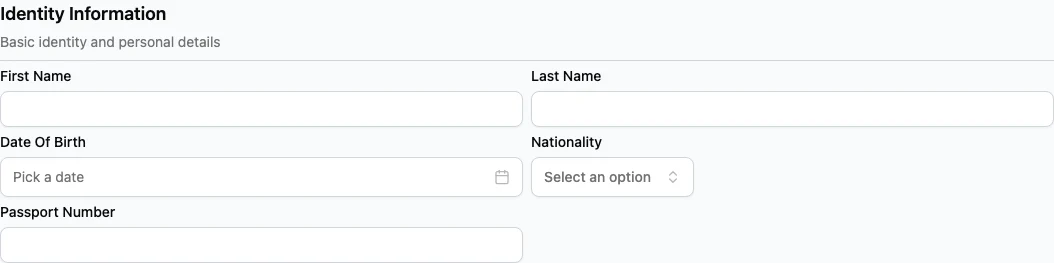
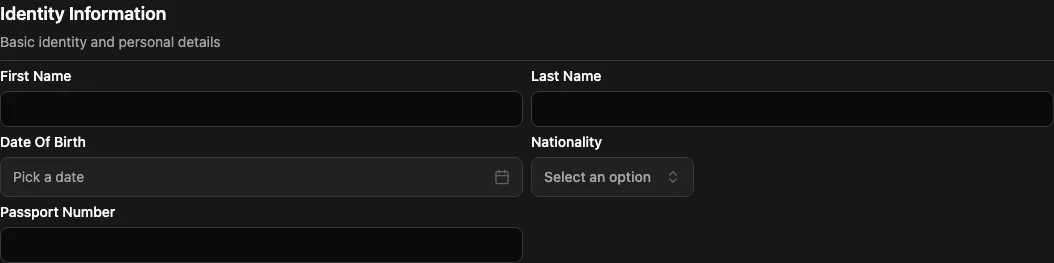
If you only have partial information, enter what your workflow requires and use tasks or notes for follow-up. Do not put application-specific details in student fields when that information belongs to one application.
Review the profile page
Open a student from the Students list to review their profile. The top of the page shows the student's name, created date, assigned user, status, and actions available to your role. Active profiles can show a Create Application action.
The profile page is organized into tabs. You may see fewer tabs depending on your permissions and enabled features.
| Tab | What to check |
|---|---|
| Overview | Student fields, notes, lead quality, and configured display sections. |
| Applications | Application history and current application work for the student. |
| Tasks | Follow-ups and operational work connected to the student. |
| Documents | Uploaded documents connected to the student or their work. |
| Relationships | Connected people or organizations, when your workspace uses relationships. |
| Groups & Cases | Grouped work or cases, when your workspace uses them. |
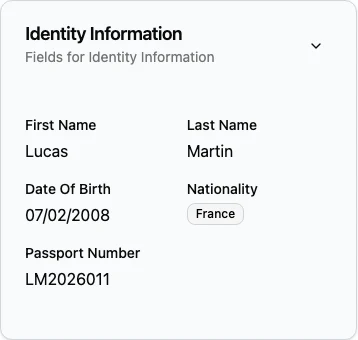
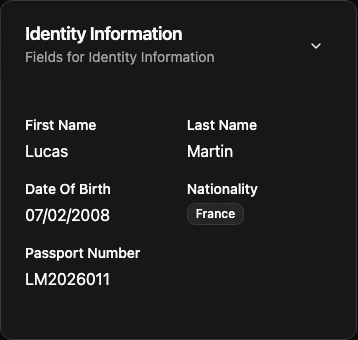
Use the Overview tab for information that should stay with the student across multiple applications. Use the Applications tab for program, institution, stage, checklist, and outcome work that belongs to a specific application.
Update details safely
Use the edit action when you need to correct or complete student details. The edit page shows the same configured student field groups, with required fields marked by your workspace setup.
Before saving, check:
| Check | Why it matters |
|---|---|
| Name and contact details | These are used by counselors and follow-up work. |
| Passport and nationality details | These often affect application requirements. |
| Source and lead details | These help reporting and follow-up prioritization. |
| Study preferences | These guide application recommendations and counselor handoff. |
| Location | This can affect access, reporting, and who is responsible for the student. |
Use notes for context that does not fit a configured field. Use tasks for future follow-up. Use documents for uploaded files. Use applications for program-specific work.
Be careful with status, archive, and delete actions. Status changes can move a student in or out of daily lists. Archive only when the profile should stop appearing in normal work. Delete only when your admin process confirms it is safe.
Ownership and location
Ownership tells the team who is responsible for the next step. A profile may be assigned to a user or show as unassigned. If you can update ownership, choose the person who should handle follow-up, application creation, or document collection.
Location tells Edmissa which branch, office, or operating group is responsible for the student. If your role is scoped by location, moving a student to another location may change who can see or update the profile. Confirm the location before saving large changes.
Good daily habits
- Search before creating a new profile.
- Keep student fields focused on the student, not one application.
- Use the Applications tab for application-specific progress.
- Use tasks for reminders and follow-ups.
- Use documents for files instead of putting file notes into profile fields.
- Check ownership and location before handing work to another team member.
- Avoid archive, delete, or status changes unless you know the operational impact.
Related guides
| Guide | Use it for |
|---|---|
| Leads | Review incoming Leads before creating or continuing a student profile. |
| Lead to student profile | Follow the intake decision path before creating or connecting a student profile. |
| Applications | Manage application work connected to a student. |
| Tasks and follow-ups | Assign and complete follow-up work. |
| Documents | Manage uploaded files connected to students and applications. |
| Student fields | Configure the fields shown on student profiles and forms. |
| Form templates | Control which fields appear when creating or editing students. |
| Locations | Set up branch, office, or operating group context. |
| Users | Manage team members who can own student work. |
| Permissions and scope | Decide what users can see and update. |
Video transcript
Once a Lead has been qualified, it can be converted into a student profile. This becomes the central working home for the student's information and the work your agency is doing for them.
Before we explore the profile, it is important to know that everything shown in the Overview is configurable. Your agency decides which sections and fields appear, how they are arranged, and which information should remain hidden from the everyday view. We will demonstrate this through Display Configuration later in the video.
From the Students workspace, the team can search for a student and filter profiles by details such as status, branch, source, or assigned counsellor. The list can also show ownership, Lead quality, and quick counts for applications, tasks, and documents.
Access to students and applications is controlled through roles, permissions, data scope, and branch assignments. For example, counsellors can be limited to students and applications assigned to them. A manager can work with the students and applications assigned to their team, while a branch manager can oversee the work belonging to their branch. Wider organisation-level access can be reserved for directors or administrators.
When we open a profile, the header shows the student's identity, assigned team member, current status, and the option to create an application when permitted.
The Overview can bring together contact information, nationality and passport details, preferred destinations or universities, study level, intended intake, English test information, academic results, financial capacity, and the original Lead context.
These are only examples. Your agency can add more fields, remove fields that are not relevant, and organise the information around its own counselling and admissions workflow. This gives each team enough detail to work effectively without turning the profile into a cluttered form.
The Applications tab connects the student with every application being managed for them. One student can have multiple applications, each following its own pipeline, stage, ownership, requirements, and outcome, without duplicating the student's shared identity and contact information.
The separation is simple: information that stays with the person belongs to the student profile. Information that changes by university, programme, country, or visa process belongs to the individual application.
Tasks keep follow-ups and deadlines visible, while Documents keep the student's files connected to their work. When an application is opened, its Comments tab gives authorised team members a dedicated place for discussions, handover notes, updates, and replies. This keeps important operational context inside the application instead of leaving it scattered across private WhatsApp conversations.
Administrators can manage the information structure under Forms and Fields. They can create a field, choose its type, label it clearly, add help text, place it in the correct section, make it required when necessary, and apply validation. Student fields hold information shared across the student's journey, while application fields hold information that may differ between applications.
Display Configuration controls how those fields appear on the Overview. Administrators can show or hide fields, move fields between sections, reorder complete sections, adjust column layouts, change labels, hide empty information, and preview the finished profile.
Hiding a field from the Overview does not delete the field or its stored information. It only removes it from that display. Access to the underlying student or application data continues to be governed by roles and permissions.
The result is a student profile shaped around the agency's real process: one reliable place where authorised counsellors, managers, application teams, and documentation staff can understand the student and continue the journey without repeatedly searching through spreadsheets, folders, and message history.