

Notification Templates
Create and edit the messages Edmissa sends for notification events.
Notification templates control the text and channel content for Edmissa notifications. Use them when the timing and channels are right, but the message needs clearer wording, a different subject, or extra context.
Open templates
Go to Settings > Communications > Templates.
The direct route is /t/settings/notification-templates.
The page title is Notification Templates. Only users with notification management access can create, edit, duplicate, preview, test, or delete templates.
Template list
The templates page shows a table of notification templates. You can filter by Category, search by name with Search templates..., and review these columns:
| Column | What it shows |
|---|---|
| Name | The template name and slug. |
| Event Type | The event that can trigger the template. |
| Category | The category Edmissa uses for grouping and defaults. |
| Channels | The delivery channels the template supports. |
| Status | Whether the template is Active or Inactive. |
Use the actions menu on a template to choose Edit, Duplicate, Preview, Send Test, or Delete.
Create a template
- Click New Template.
- Complete Basic Information.
- Select an Event Type.
- Choose Delivery Channels.
- Write the Template Content for the channels you selected.
- Keep Active (template can be used) selected when the template is ready.
- Click Create Template.
Basic Information
The editor starts with the Basic Information card.
| Field | How to use it |
|---|---|
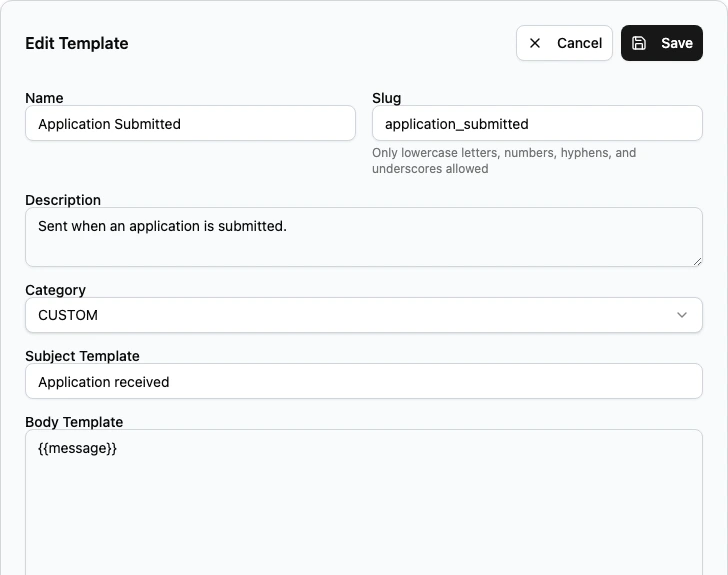
| Template Name | Use a clear admin-facing name, such as Application Approved. |
| Slug | Edmissa generates this from the name for new templates. The slug cannot be changed after creation. |
| Description | Add a short note about when the template should be used. |
| Event Type | Required. Select the event that triggers the notification. Choose Custom Event for manual triggers or scheduled notifications. |
| Category | Usually set automatically from the selected event type. |
| Default Priority | Choose Low, Normal, High, or Urgent. |
| Delivery Channels | Select one or more channels, such as In-App, Email, SMS, or Push. |
| Active (template can be used) | Leave selected when the template should be available for use. |
If a channel appears locked or unavailable, it is not available for the current workspace setup or plan.
Event Conditions
After you select an event type, Edmissa shows Event Conditions (Optional). Use conditions when one event should send different messages in different cases.
Each condition has a field, an operator, and a value. All conditions must be true before the template is used.
For example, you might create a high-priority task template that only applies when the priority field equals High. You might also create an application template that only applies when the application reaches a specific stage.
Template Content
The Template Content card changes based on the delivery channels you select.
Subject Template
The Subject Template is required. It is used as the notification title and as the email subject when email is selected.
Type {{ to open variable autocomplete. Choose variables from the list shown by
Edmissa instead of guessing variable names.
Email Content
When Email is selected, the editor shows Email Content with two modes:
| Mode | Use it when |
|---|---|
| Rich Editor (Blocks) | You want formatted email content with reusable blocks. |
| Plain Text | You want a simple text email. |
The rich editor lets you build the email body with blocks and reorder them. Edmissa wraps the content with the workspace email header, footer, and branding.
SMS Template
When SMS is selected, the editor shows SMS Template. Keep this message short. The SMS field tracks the character count and supports up to 160 characters.
Short Form Template
When In-App or Push is selected, the editor shows Short Form Template (IN_APP & PUSH). This is the short notification body used in the notification center and browser push alerts. Keep it brief. The field supports up to 250 characters for push compatibility.
Variables
Variables insert live information into a notification, such as a student name, application reference, stage, due date, or task title.
Use the variable autocomplete built into the editor:
- Click into a subject, email body, SMS message, or short form message.
- Type
{{. - Select a variable from the list.
- Preview the template before saving.
Variables use double braces, such as {{ variableName }}. The available
variables depend on the selected event type.
Preview and send a test
Use Preview from the template actions menu to see the rendered message. Preview can show email, plain text, SMS, and push output when those channels are part of the template. You can refresh the preview after changing sample variable values.
Use Send Test to send a test notification to your own account. Select the channels to test, review the variable values, then click Send Test.
Testing is important before activating templates that send email, SMS, or push alerts to users.
Edit, duplicate, or delete
Use Edit to change an existing template. The edit page title shows the template name and the primary button changes to Save Changes.
Use Duplicate when you want a similar template for the same kind of work. Review the new template carefully before activating it.
Use Delete only when the template should no longer be available. Deleting a template cannot be undone from the confirmation dialog.
Best practices
- Keep names and descriptions clear for admins.
- Use one template per event and purpose.
- Keep in-app and push messages short.
- Use email for messages that need more detail.
- Use SMS only for important, time-sensitive alerts.
- Preview and send a test before activating a new or heavily edited template.
- Review notification defaults after changing template channels.